Establish SSH connection to a Virtual Machine
After you generate a pair of SSH keys and ensure that a public key is available in the Gcore Customer Portal, you can use these keys to connect to your instance.
Before you proceed with the connection steps, make sure that:
- If your Virtual Machine is only connected to a private network, it has a floating IP address.
- You have set up the necessary protocols in firewall settings to allow outgoing and incoming connections to an instance.
Connect from terminal, command prompt, or WSL
Follow these instructions to connect to a Virtual Machine from Linux, macOS, or Windows 10/11 devices:
1. Open Terminal (Linux, macOS), Windows Subsystem for Linux, or Command Prompt (cmd.exe on Windows OS).
2. Connect to your Virtual Machine in one of the following ways:
- To connect using a pair of SSH keys, run the following command:
For example: ssh -i ~/.ssh/id_rsa ubuntu@185.188.146.129
- To connect with a password (only if you configured it during VM creation), run the following command and enter the password when prompted:
Tip
If you don’t know your instance’s username and public IP, you can check this information in the Customer Portal. Go to the “Cloud” section, select “Virtual Instances”, and then open your instance. Next to the Access to Console link, you’ll find the information in the following format: [login]@[ip-of your-instance].
Typically, the login coincides with the name of the OS. For example, ubuntu.
3. You’ll be asked to add the device to the list of known devices. Write yes to add or no to not add. Press Enter.
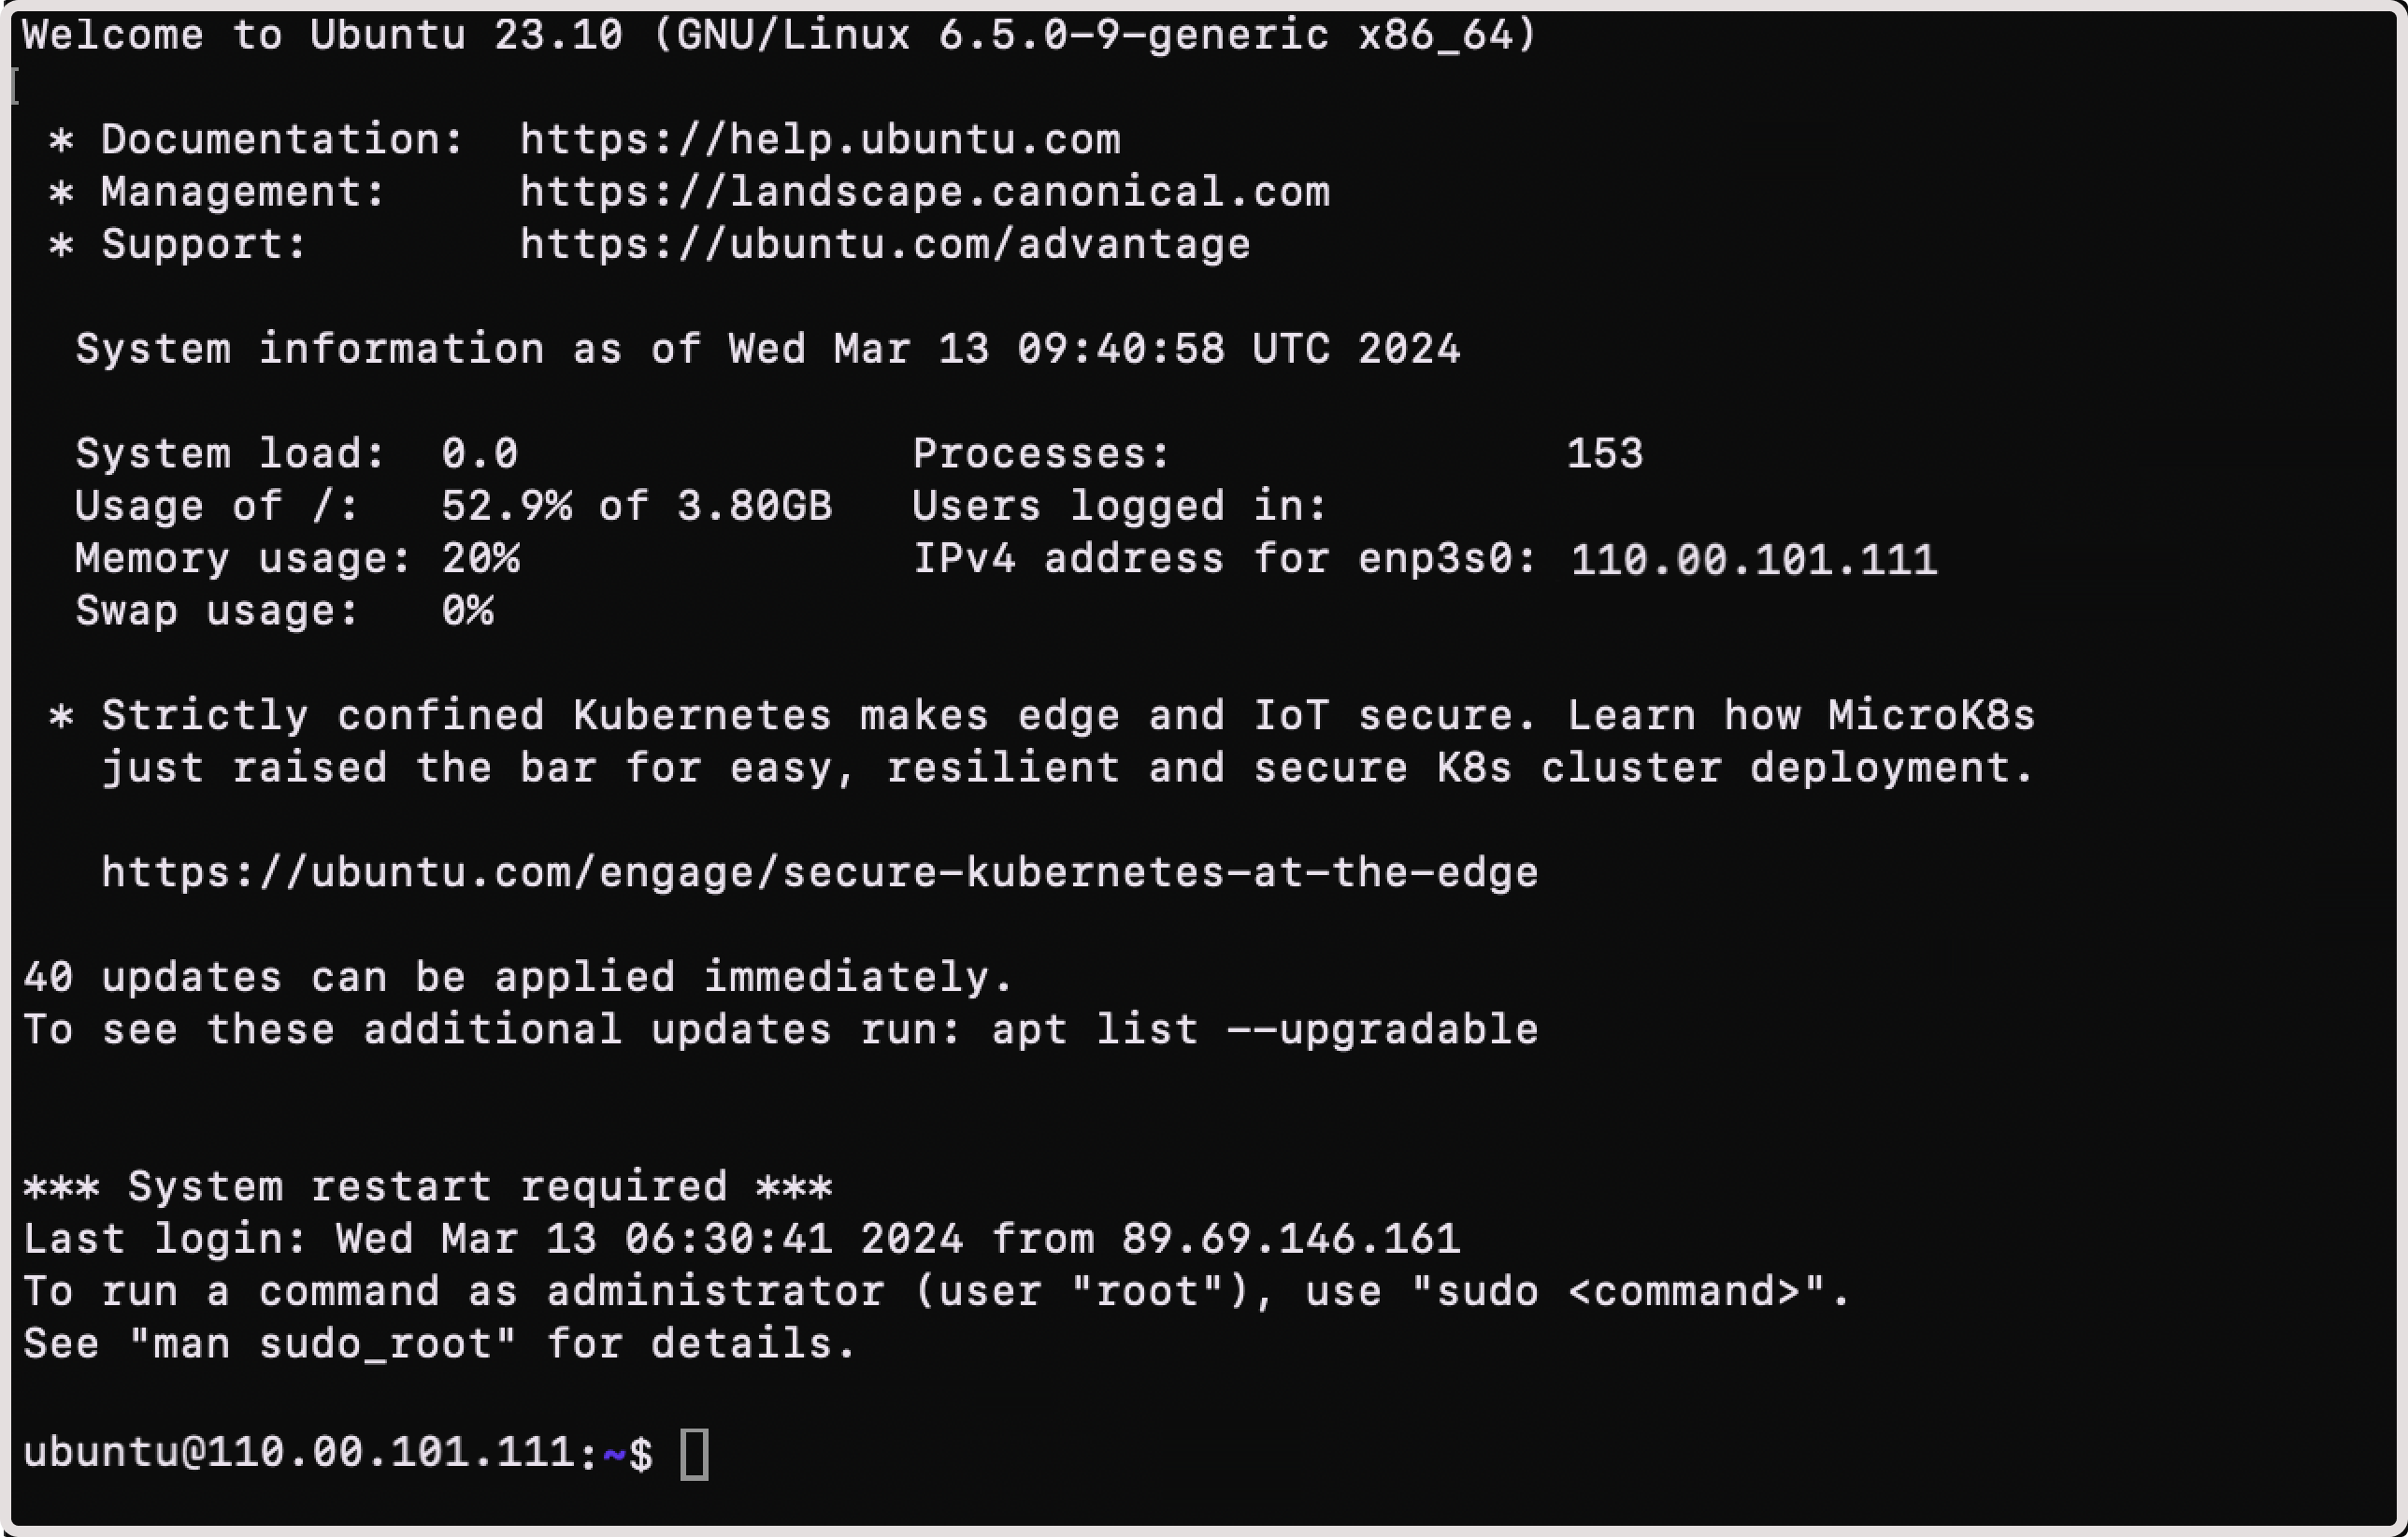
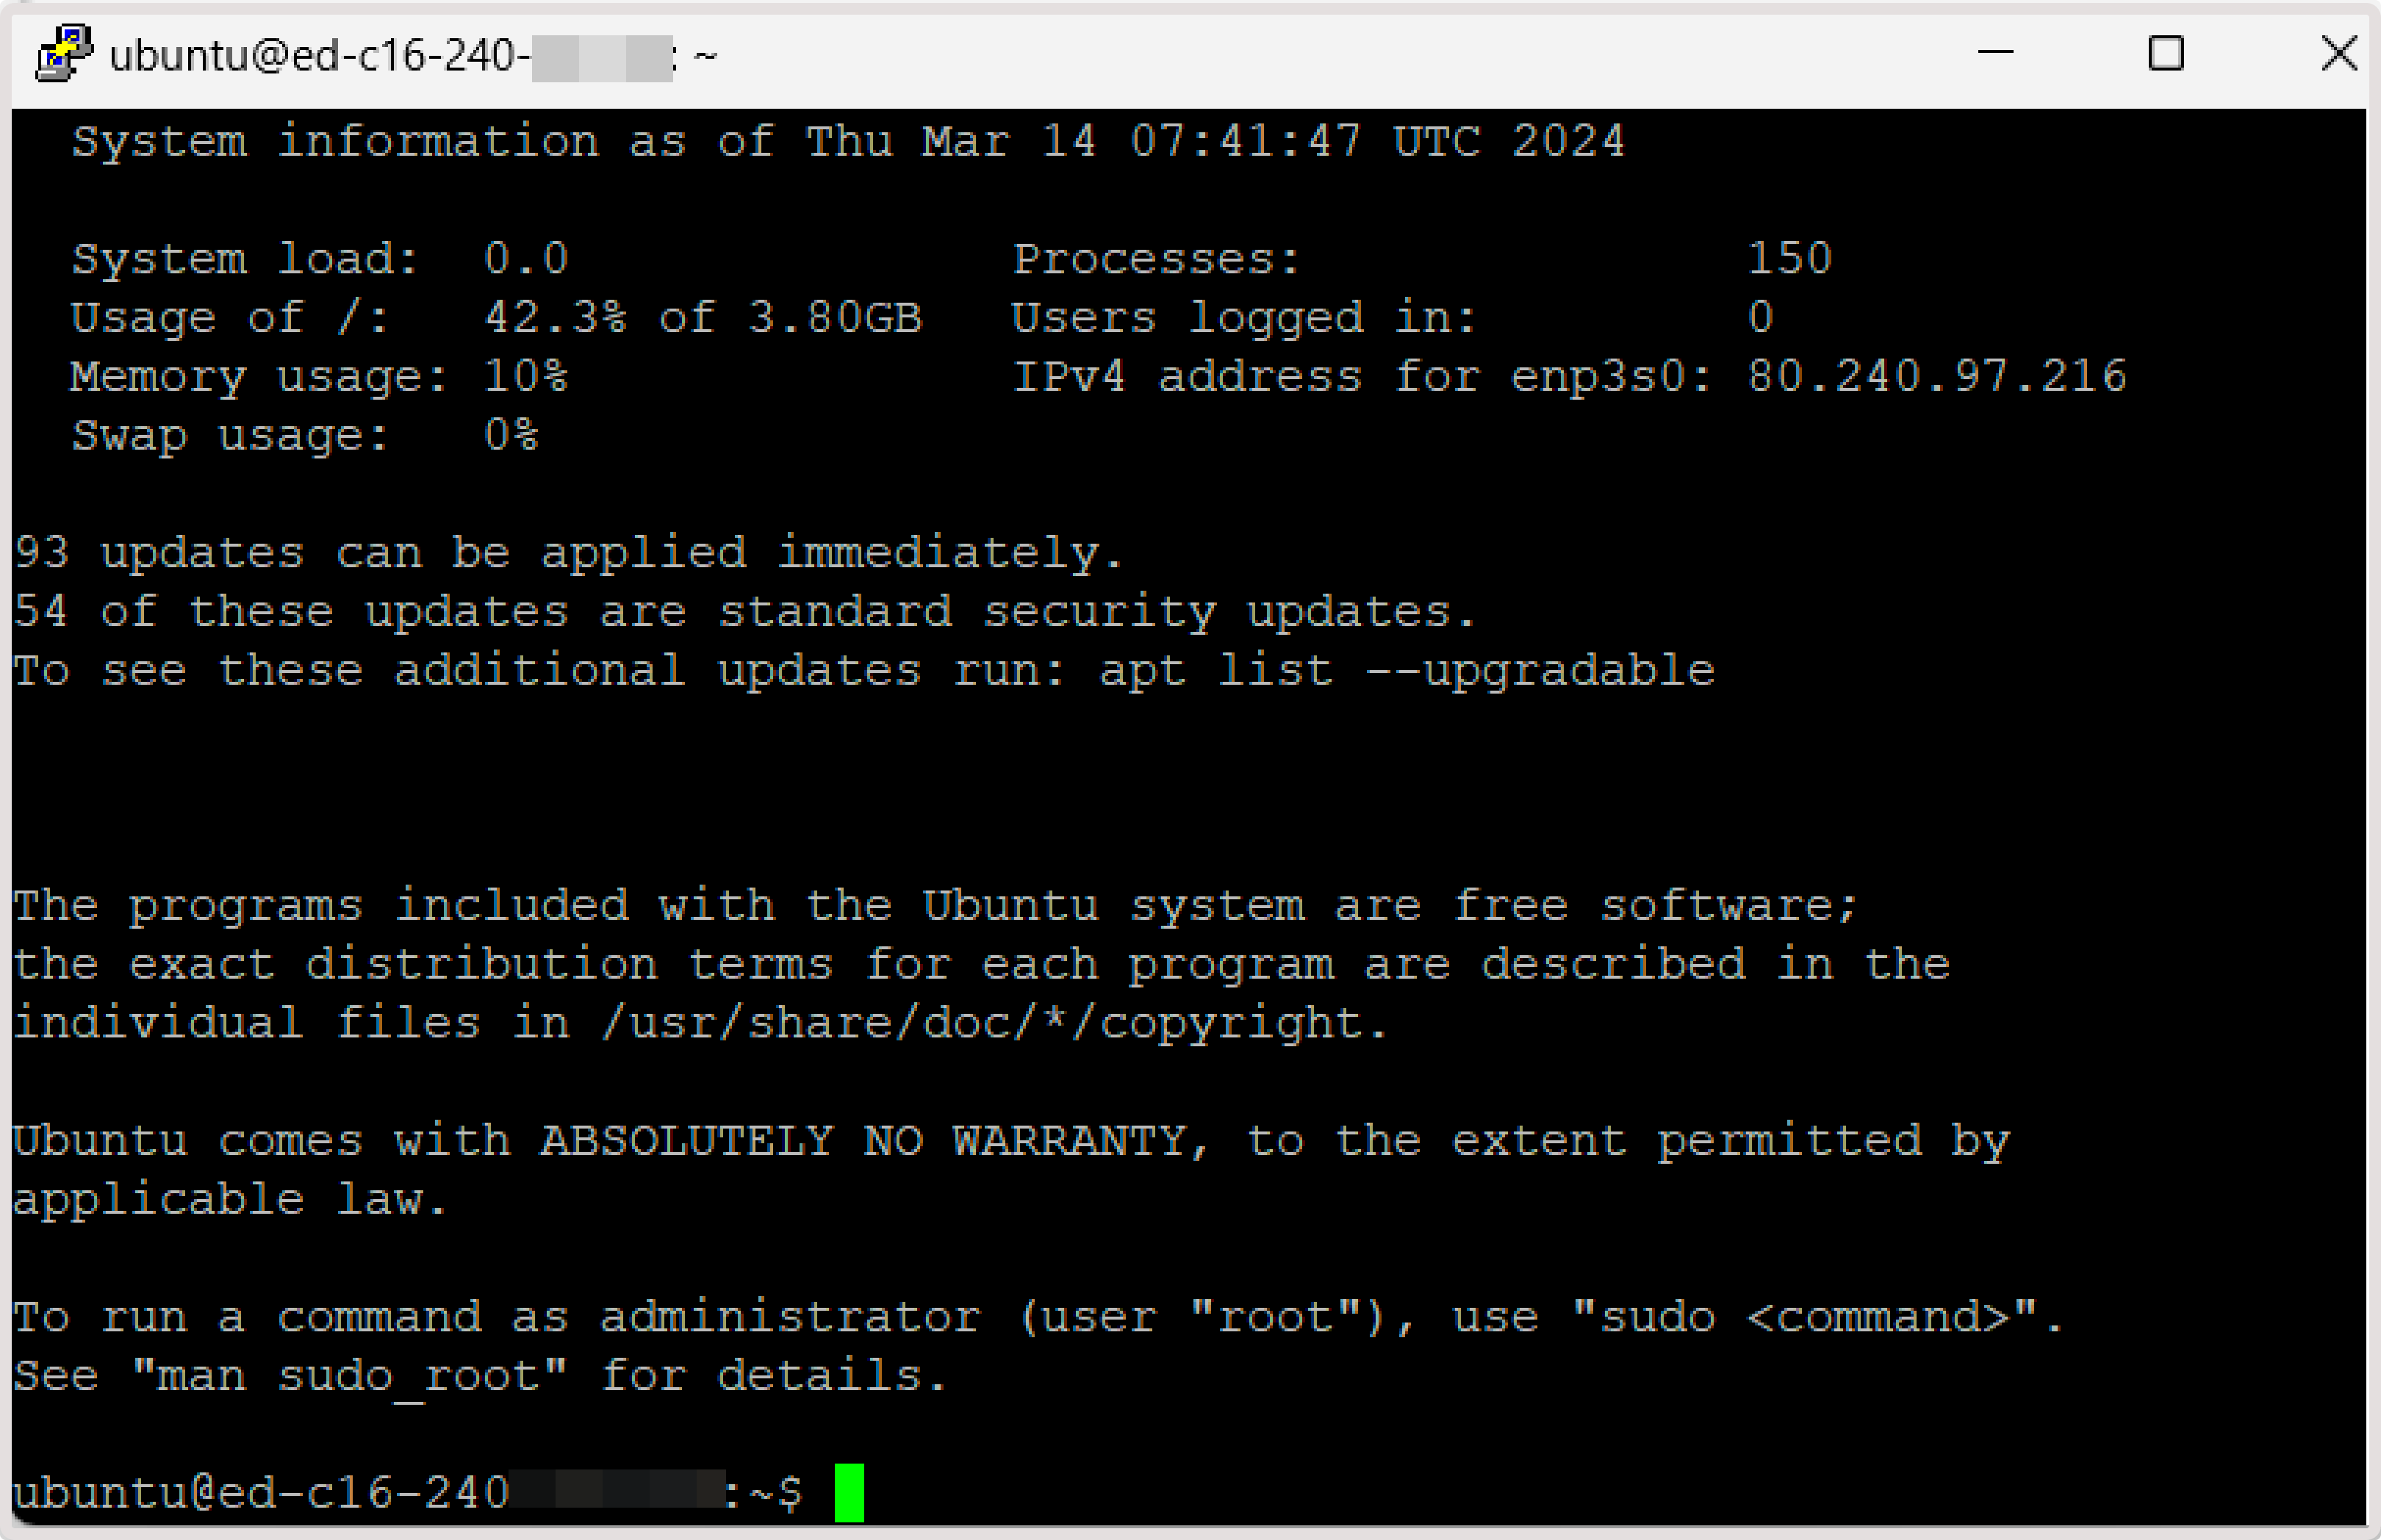
4. You’ve successfully connected to the instance.
Connect with PuTTY
Follow these instructions to connect to a Virtual Machine from Windows 10/11 devices:
1. Run the PuTTY app.
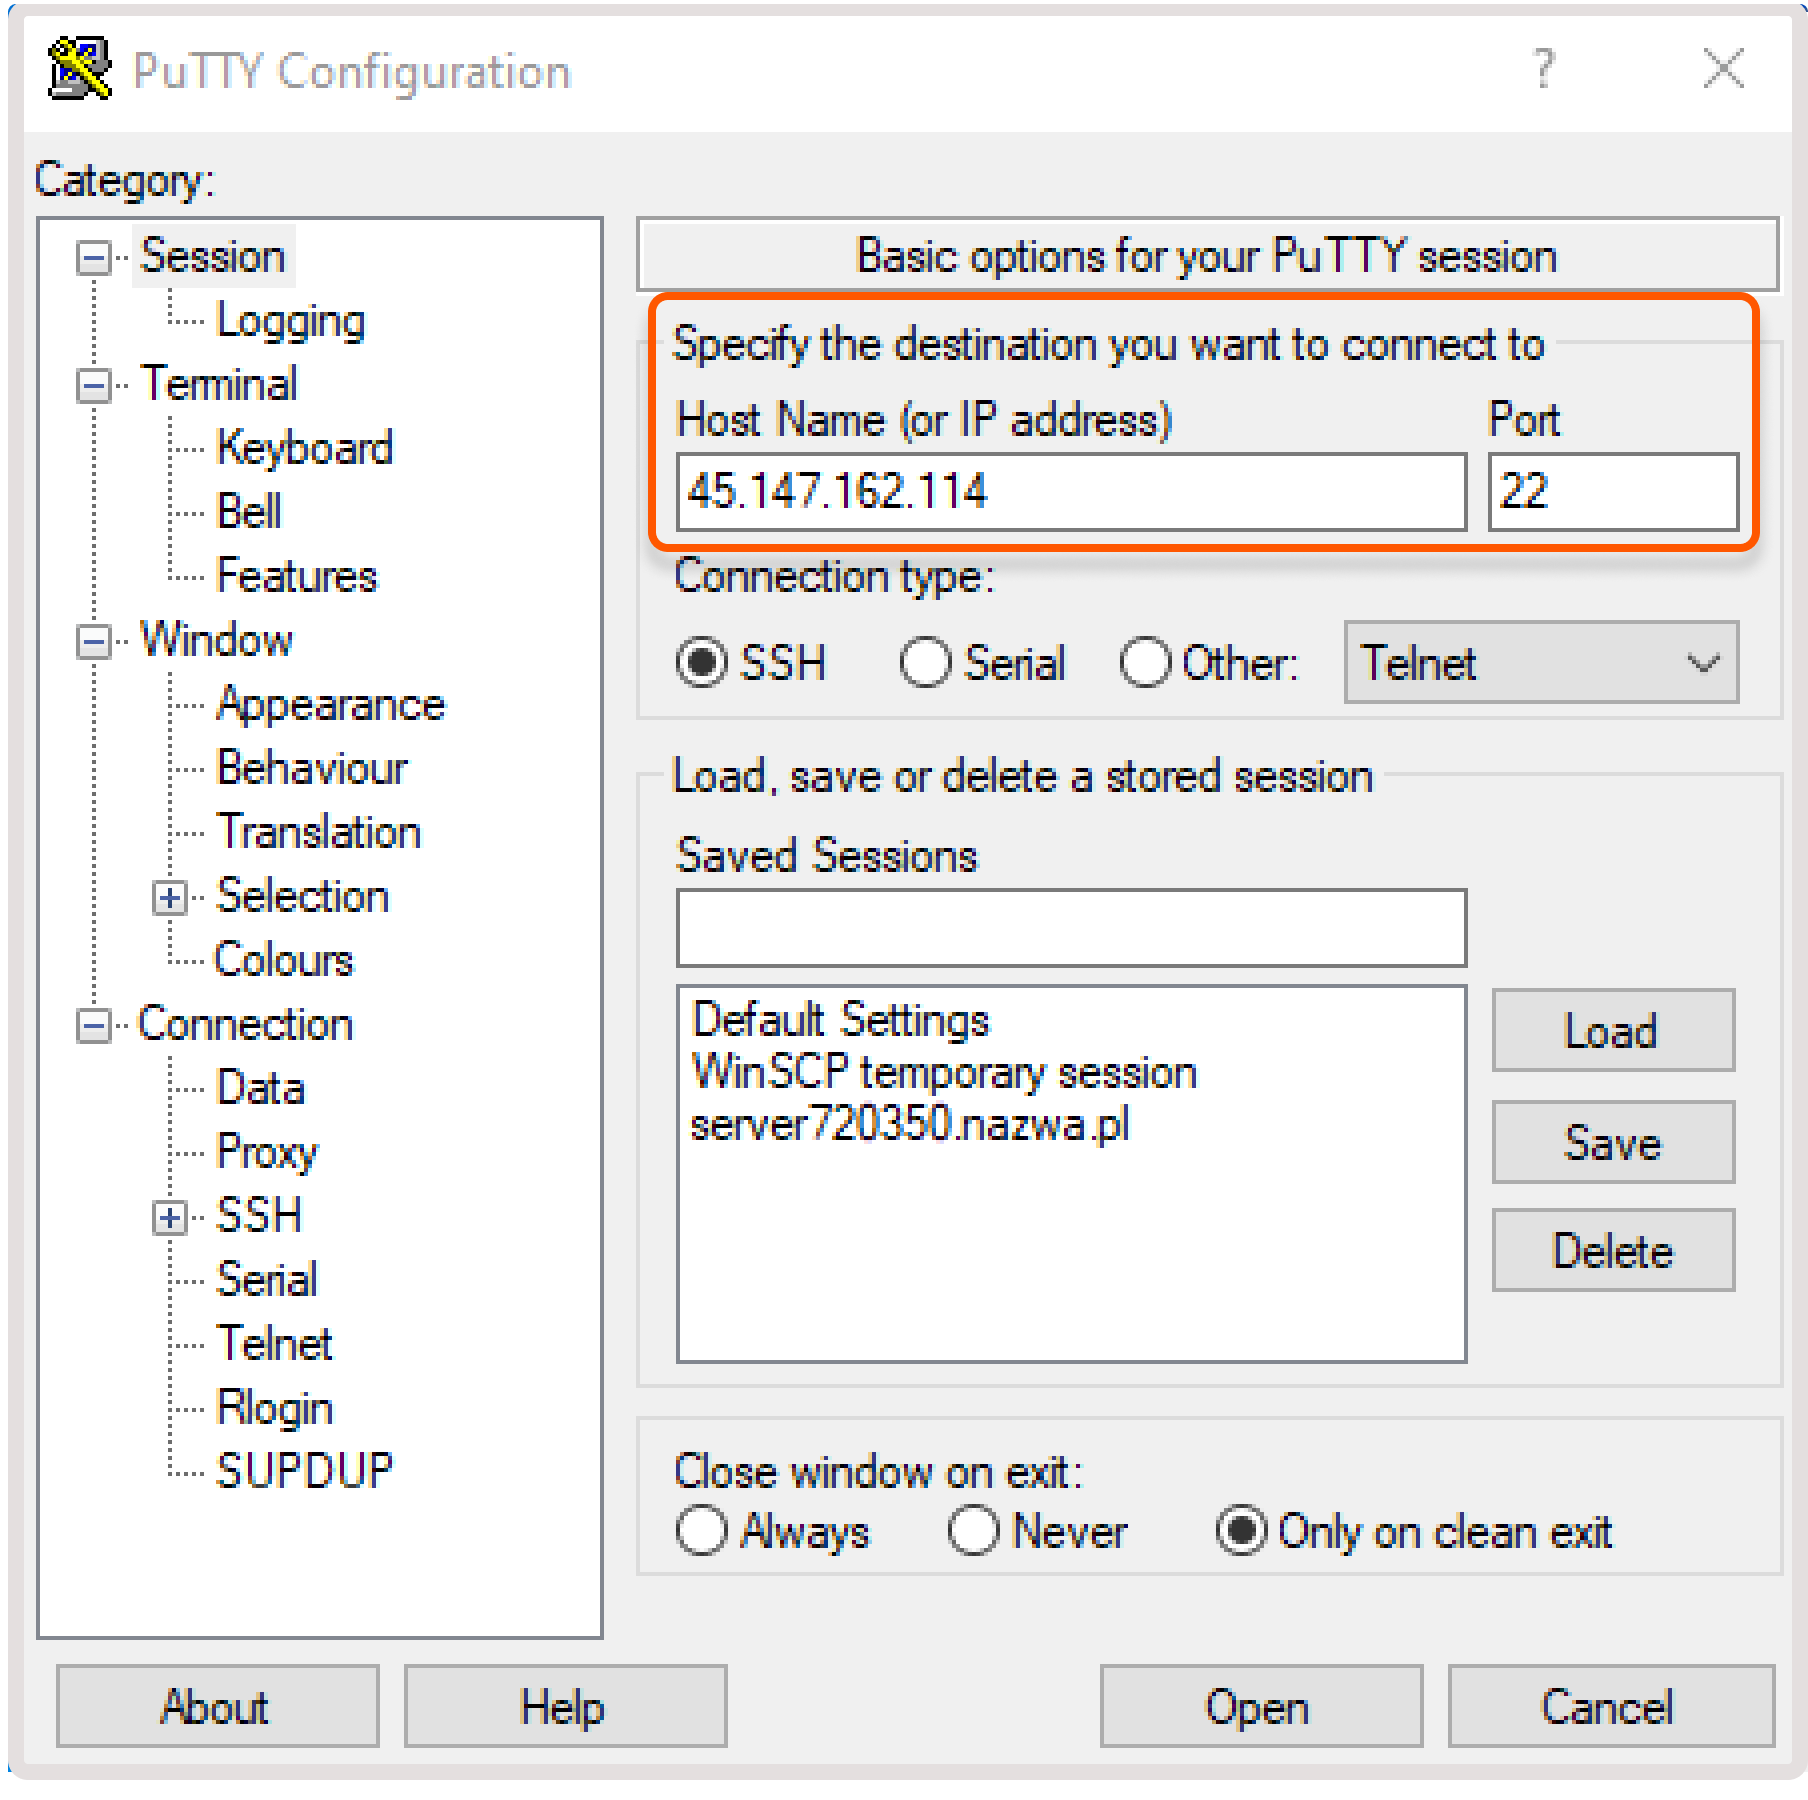
2. Open the “Session” section and enter the instance’s IP address in the “HostName (or IP address)” field.
3. Ensure that port 22 is set in the “Port” field. This is the standard port for SSH connection.
Tip
You can find the IP address of your Virtual Machine in the Gcore Customer Portal on the “Virtual Instances” tab. It will be displayed in the “IP Address” column.
4. Make sure that the “Connection type” parameter is set to SSH.
5. From the sidebar, go to Connection > SSH > Auth > Credentials.
6. Select Browse and find your private SSH key.
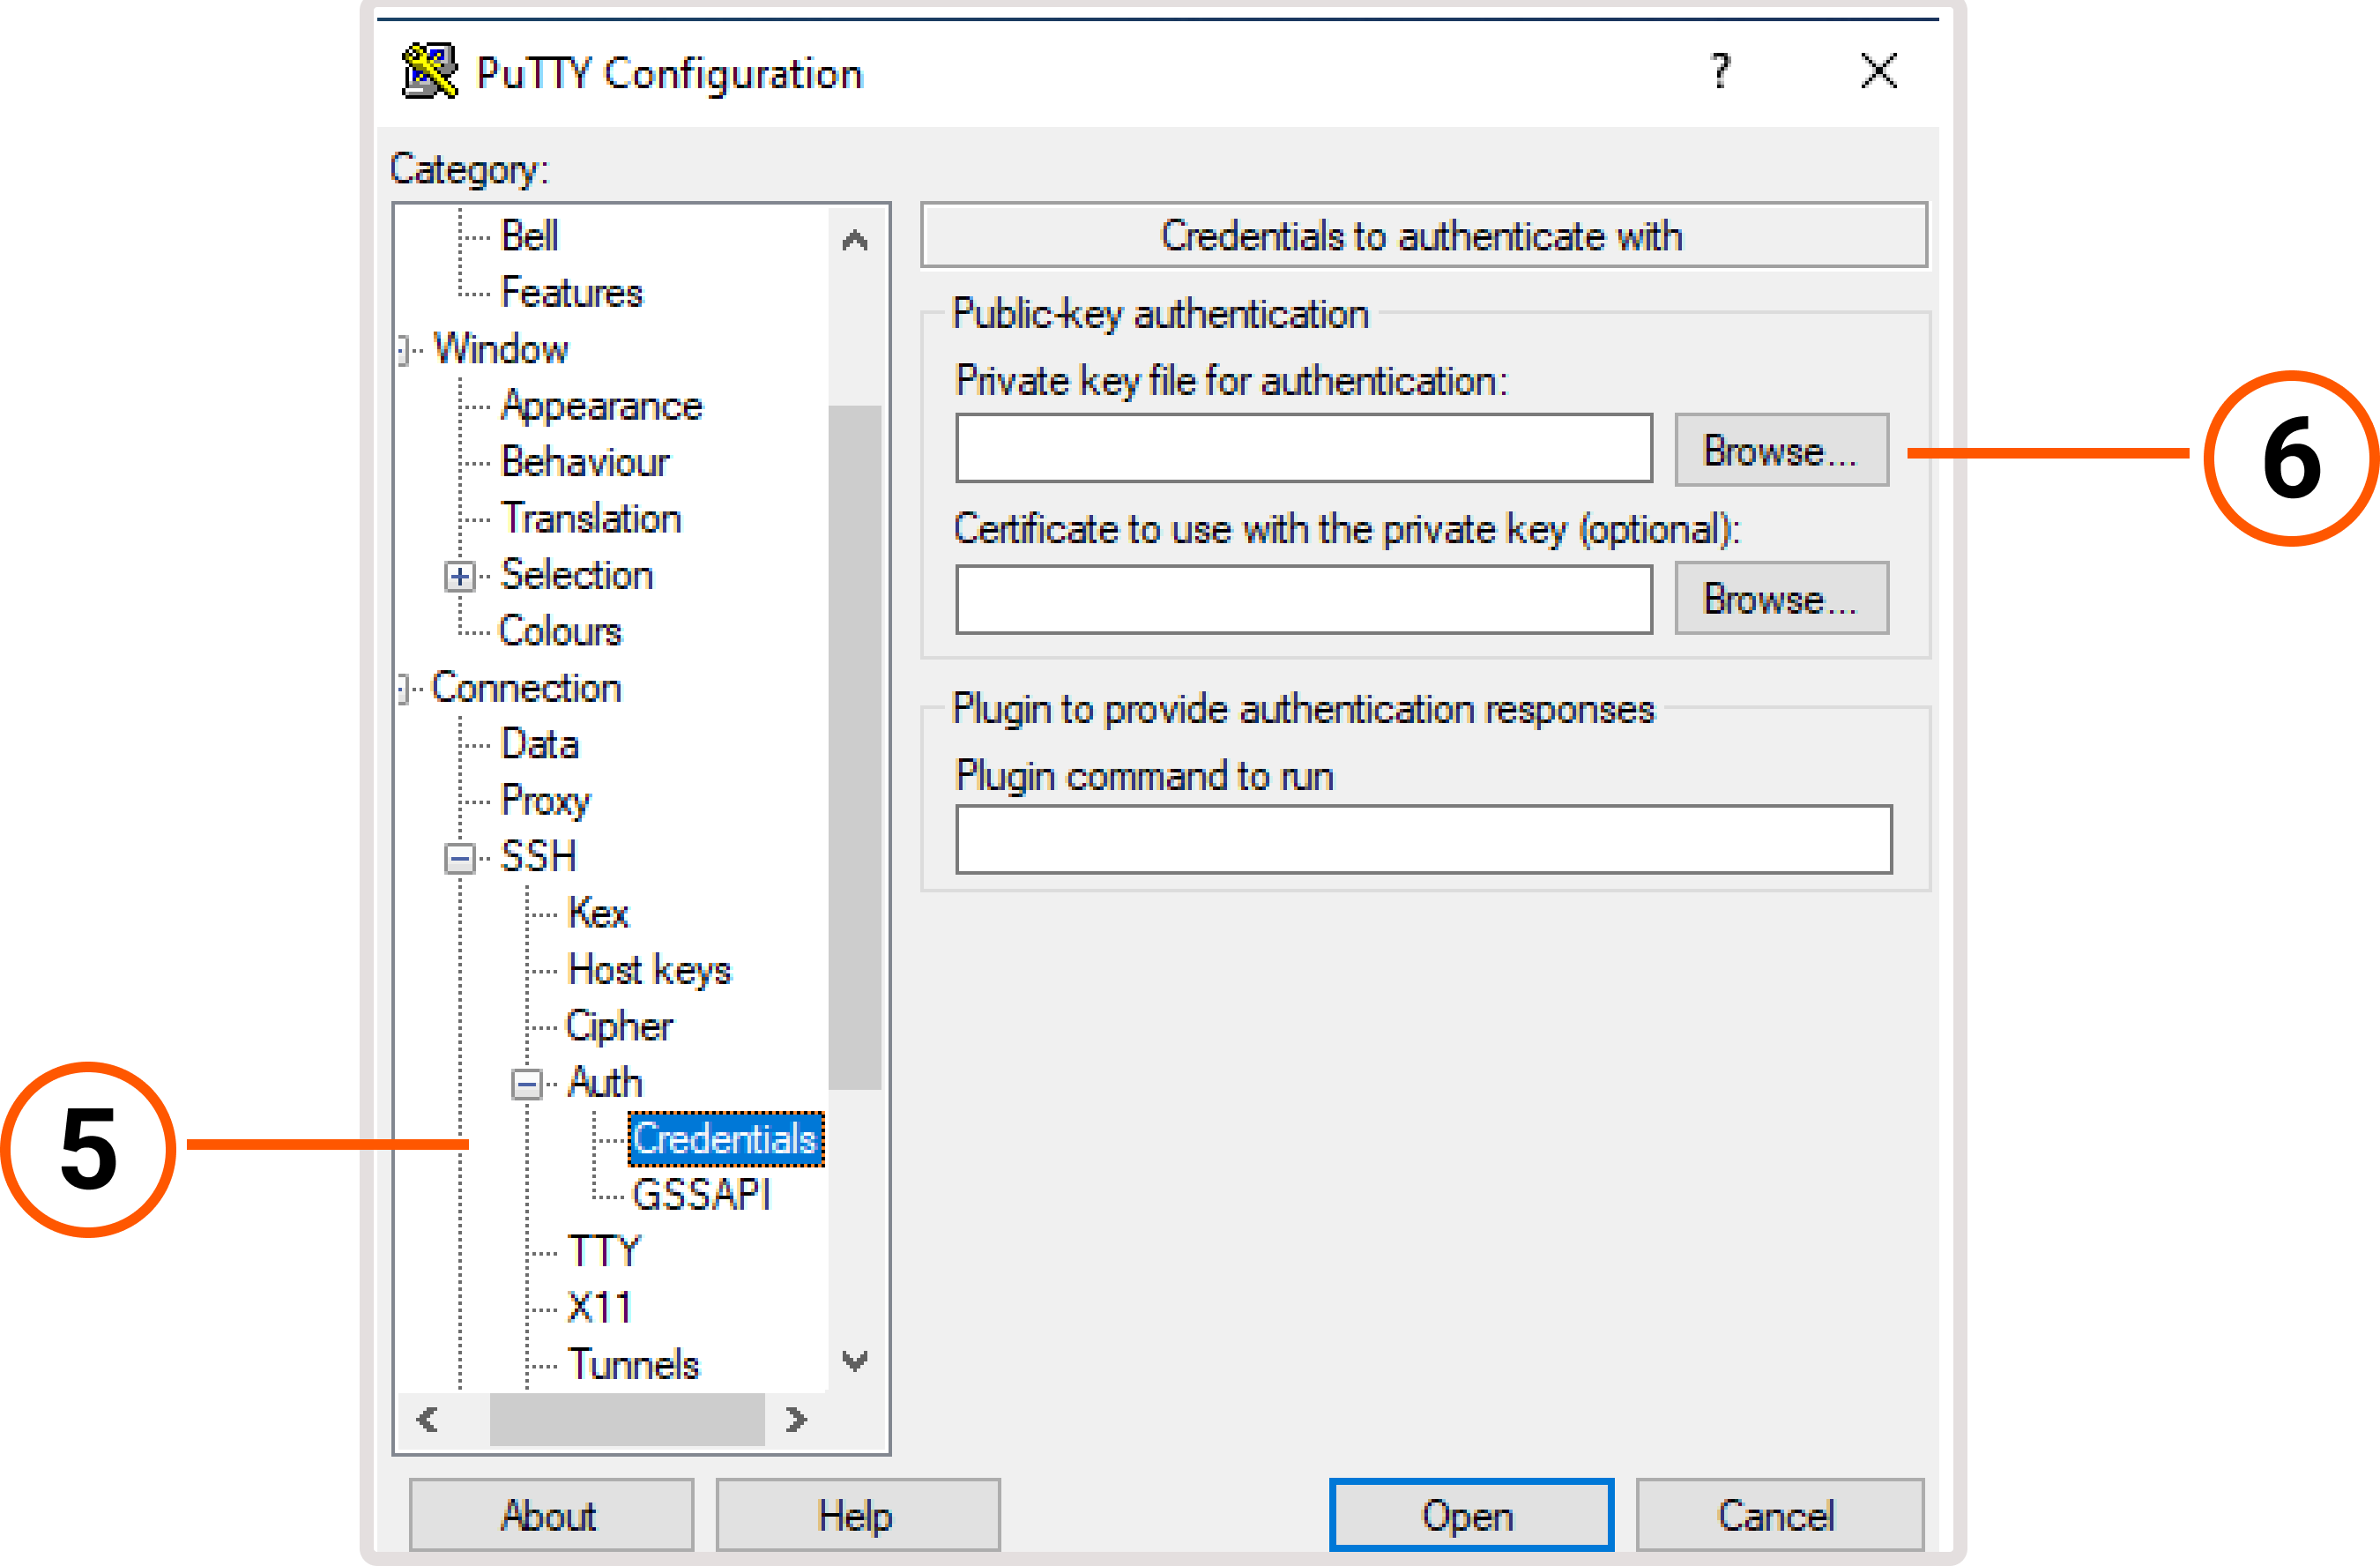
7. Load the file with the private key to the Virtual Machine in the .ppk format.
8. Select Open to launch the PuTTY terminal window.
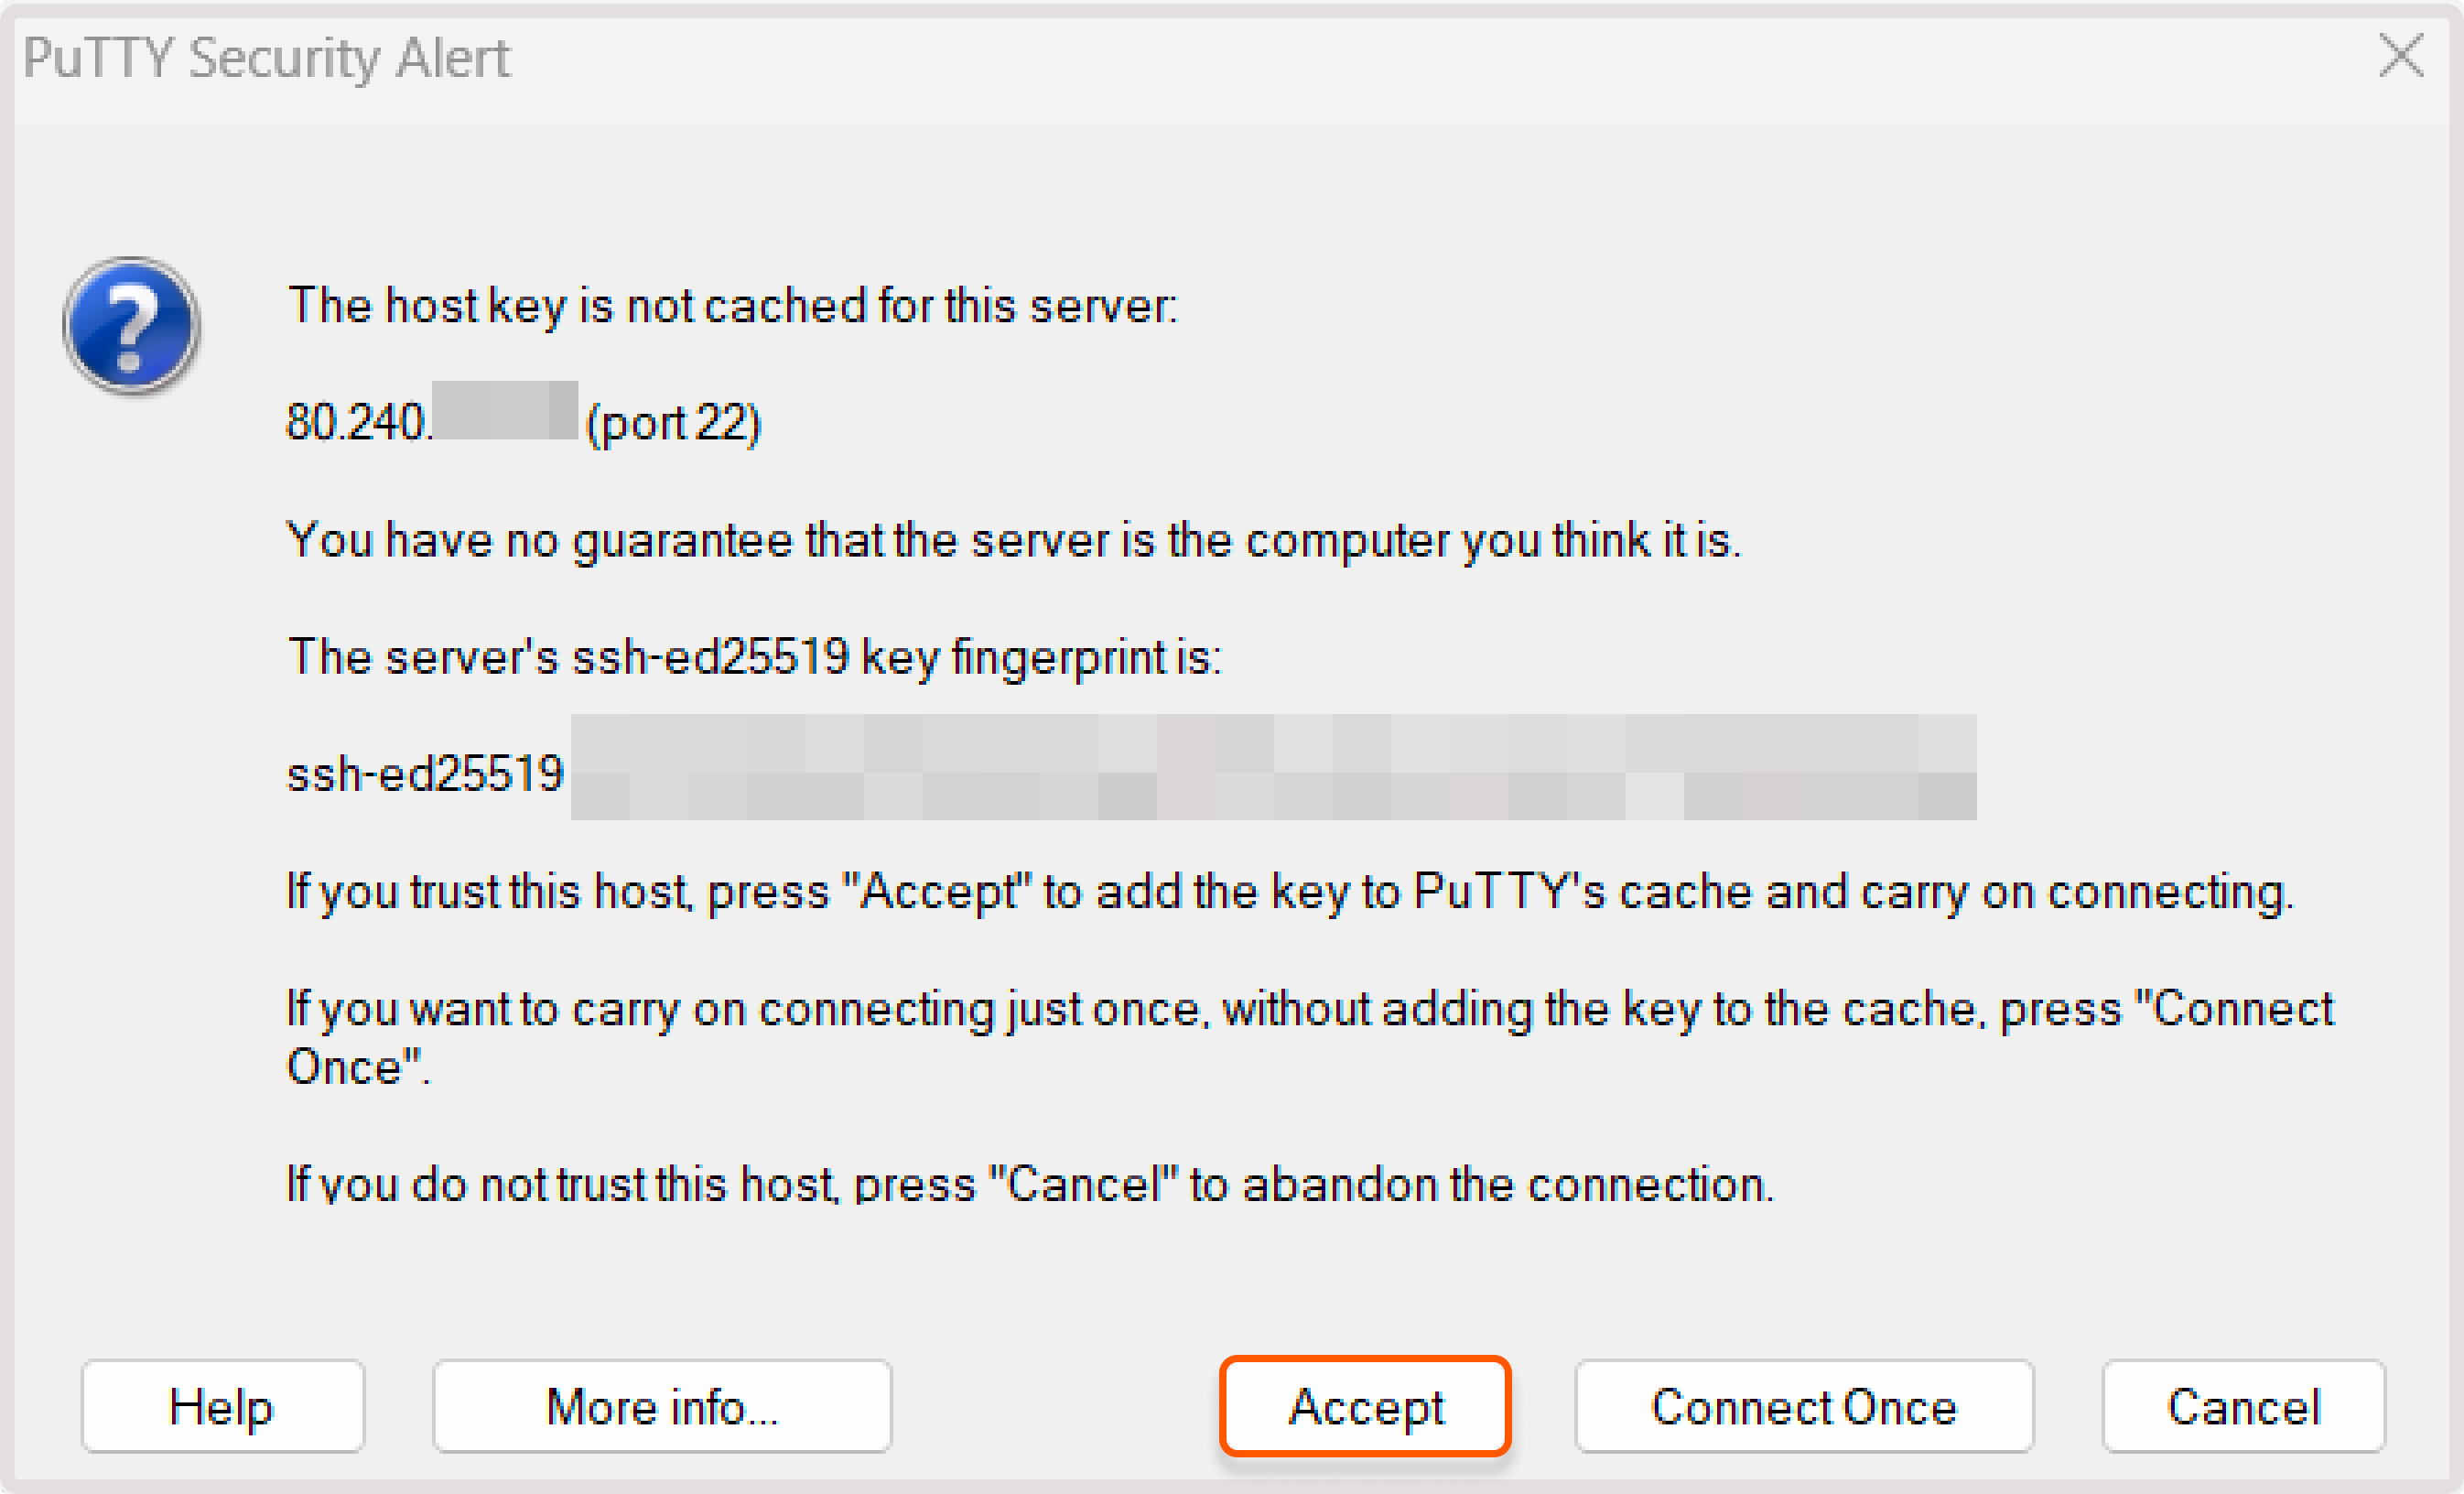
9. If you connect to the Virtual Machine for the first time, you’ll be asked if you want to save the host key of your instance. Select Accept.
10. Log in by using the following credentials:
- login : enter the username that was specified during the creation of your instance.
- password (optional): if you configured a password while creating an instance, enter your password.
Tip
If you don’t know your instance’s username and public IP, you can check this information in the Customer Portal. Go to the “Cloud” section, select “Virtual Instances”, and then open your instance. Next to the Access to Console link, you’ll find the information in the following format: [login]@[ip-of your-instance].
Typically, the login coincides with the name of the OS. For example, ubuntu.
11. Press Enter.
12. You’ve successfully connected to the instance.
Connect via OpenSSH
Windows has a built-in OpenSSH client that allows you to access the server via console, like on Linux. By default, this component is not activated. Follow these steps to activate OpenSSH:
1. Open “Windows Settings”.
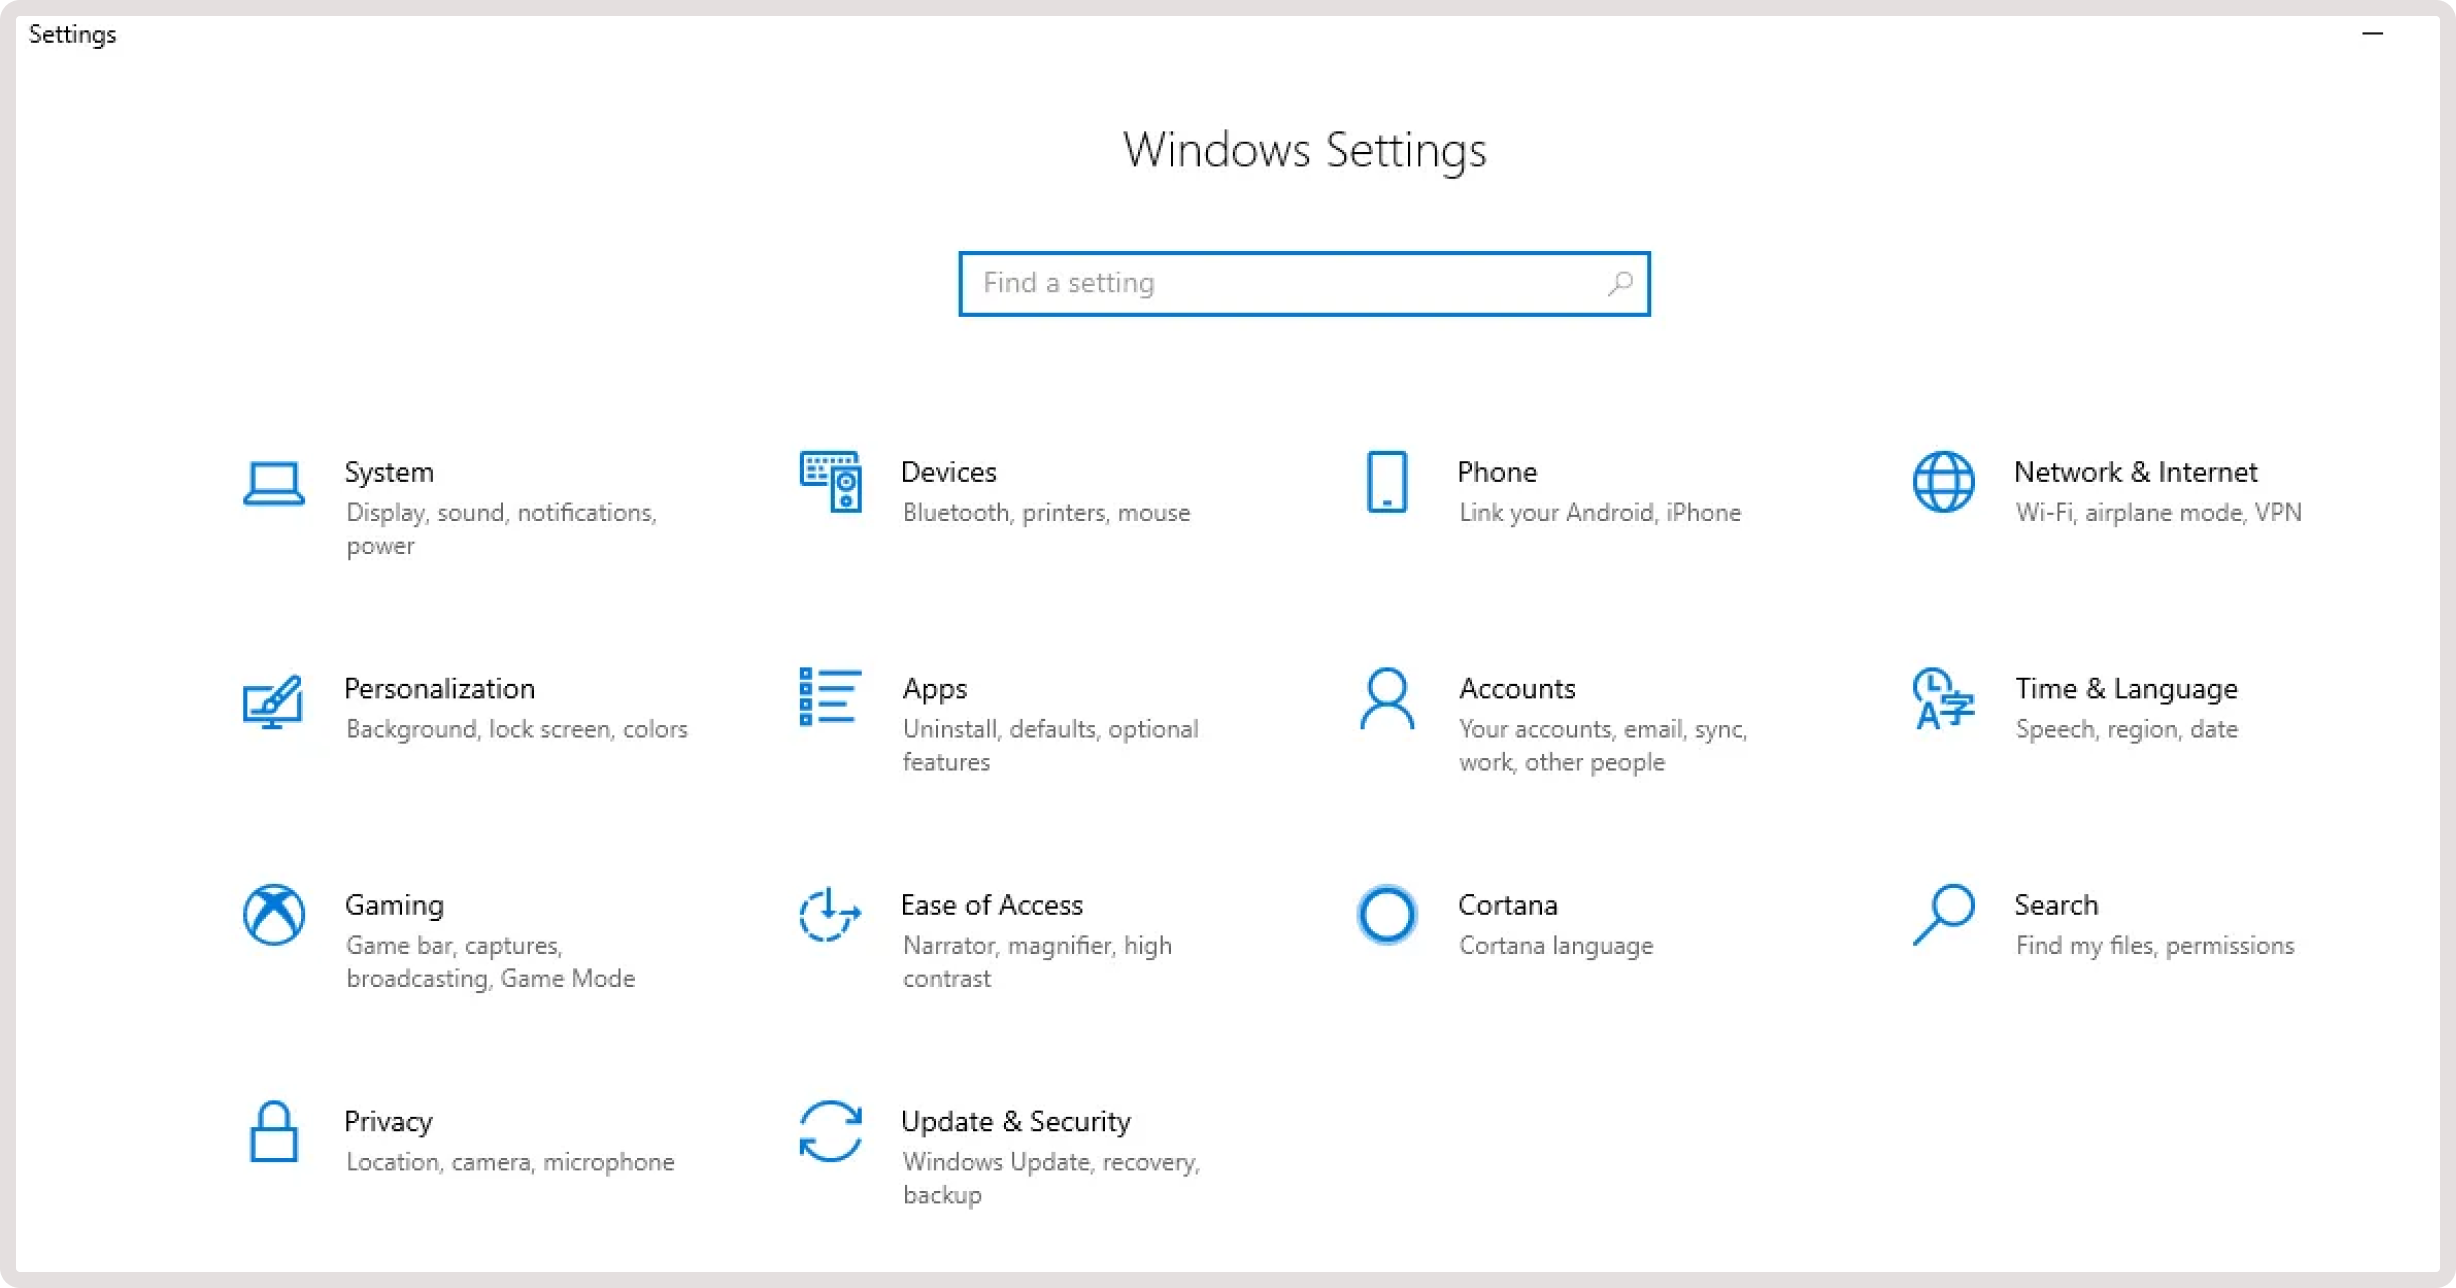
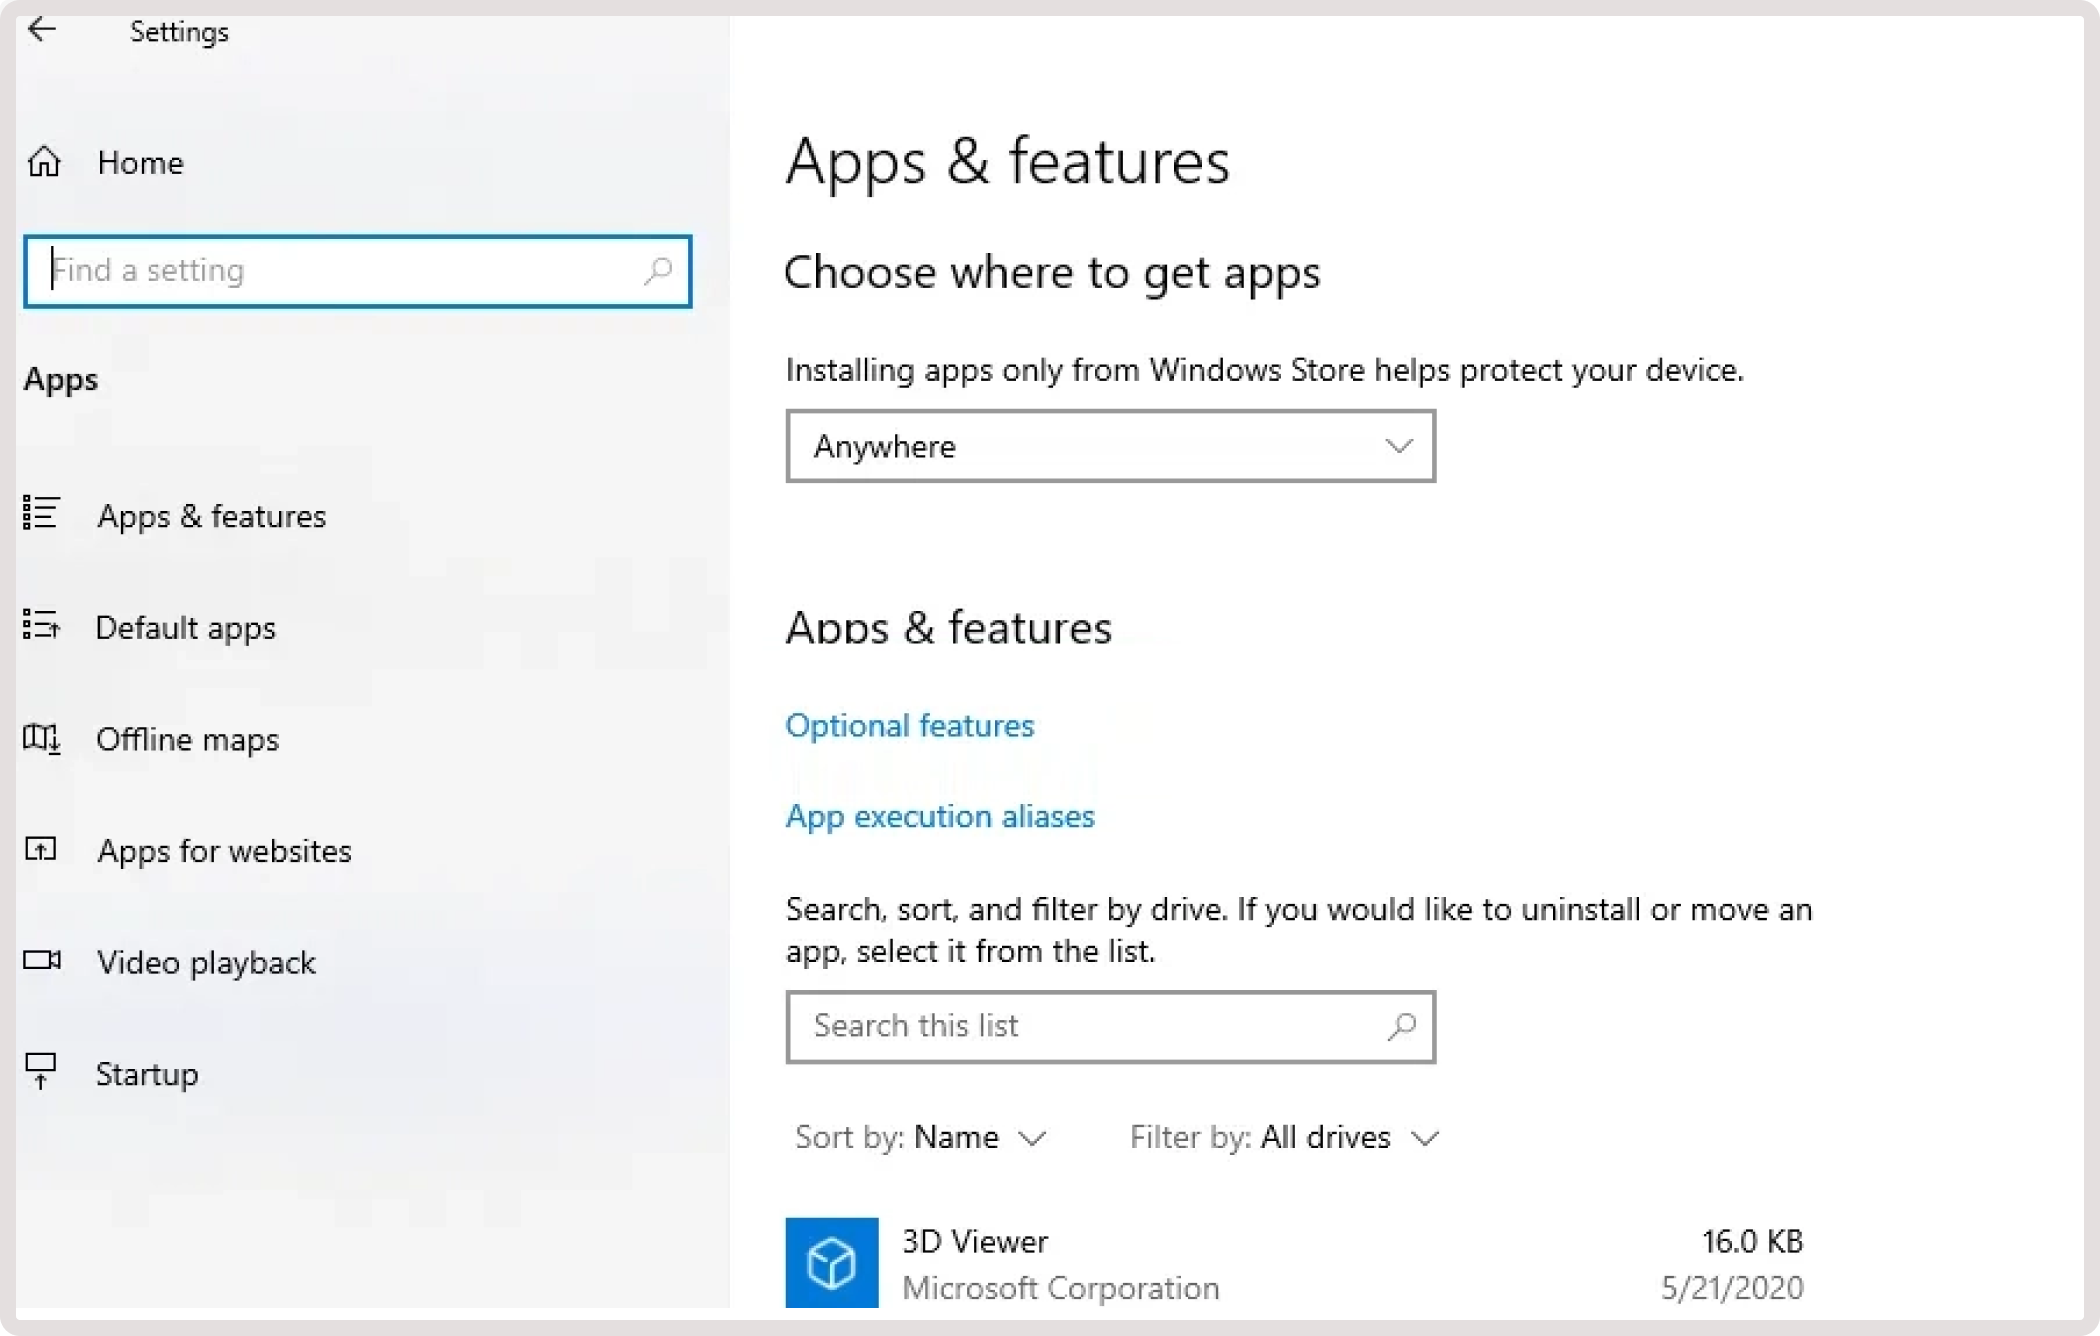
2. Go to the “Apps” section and select Optional features.
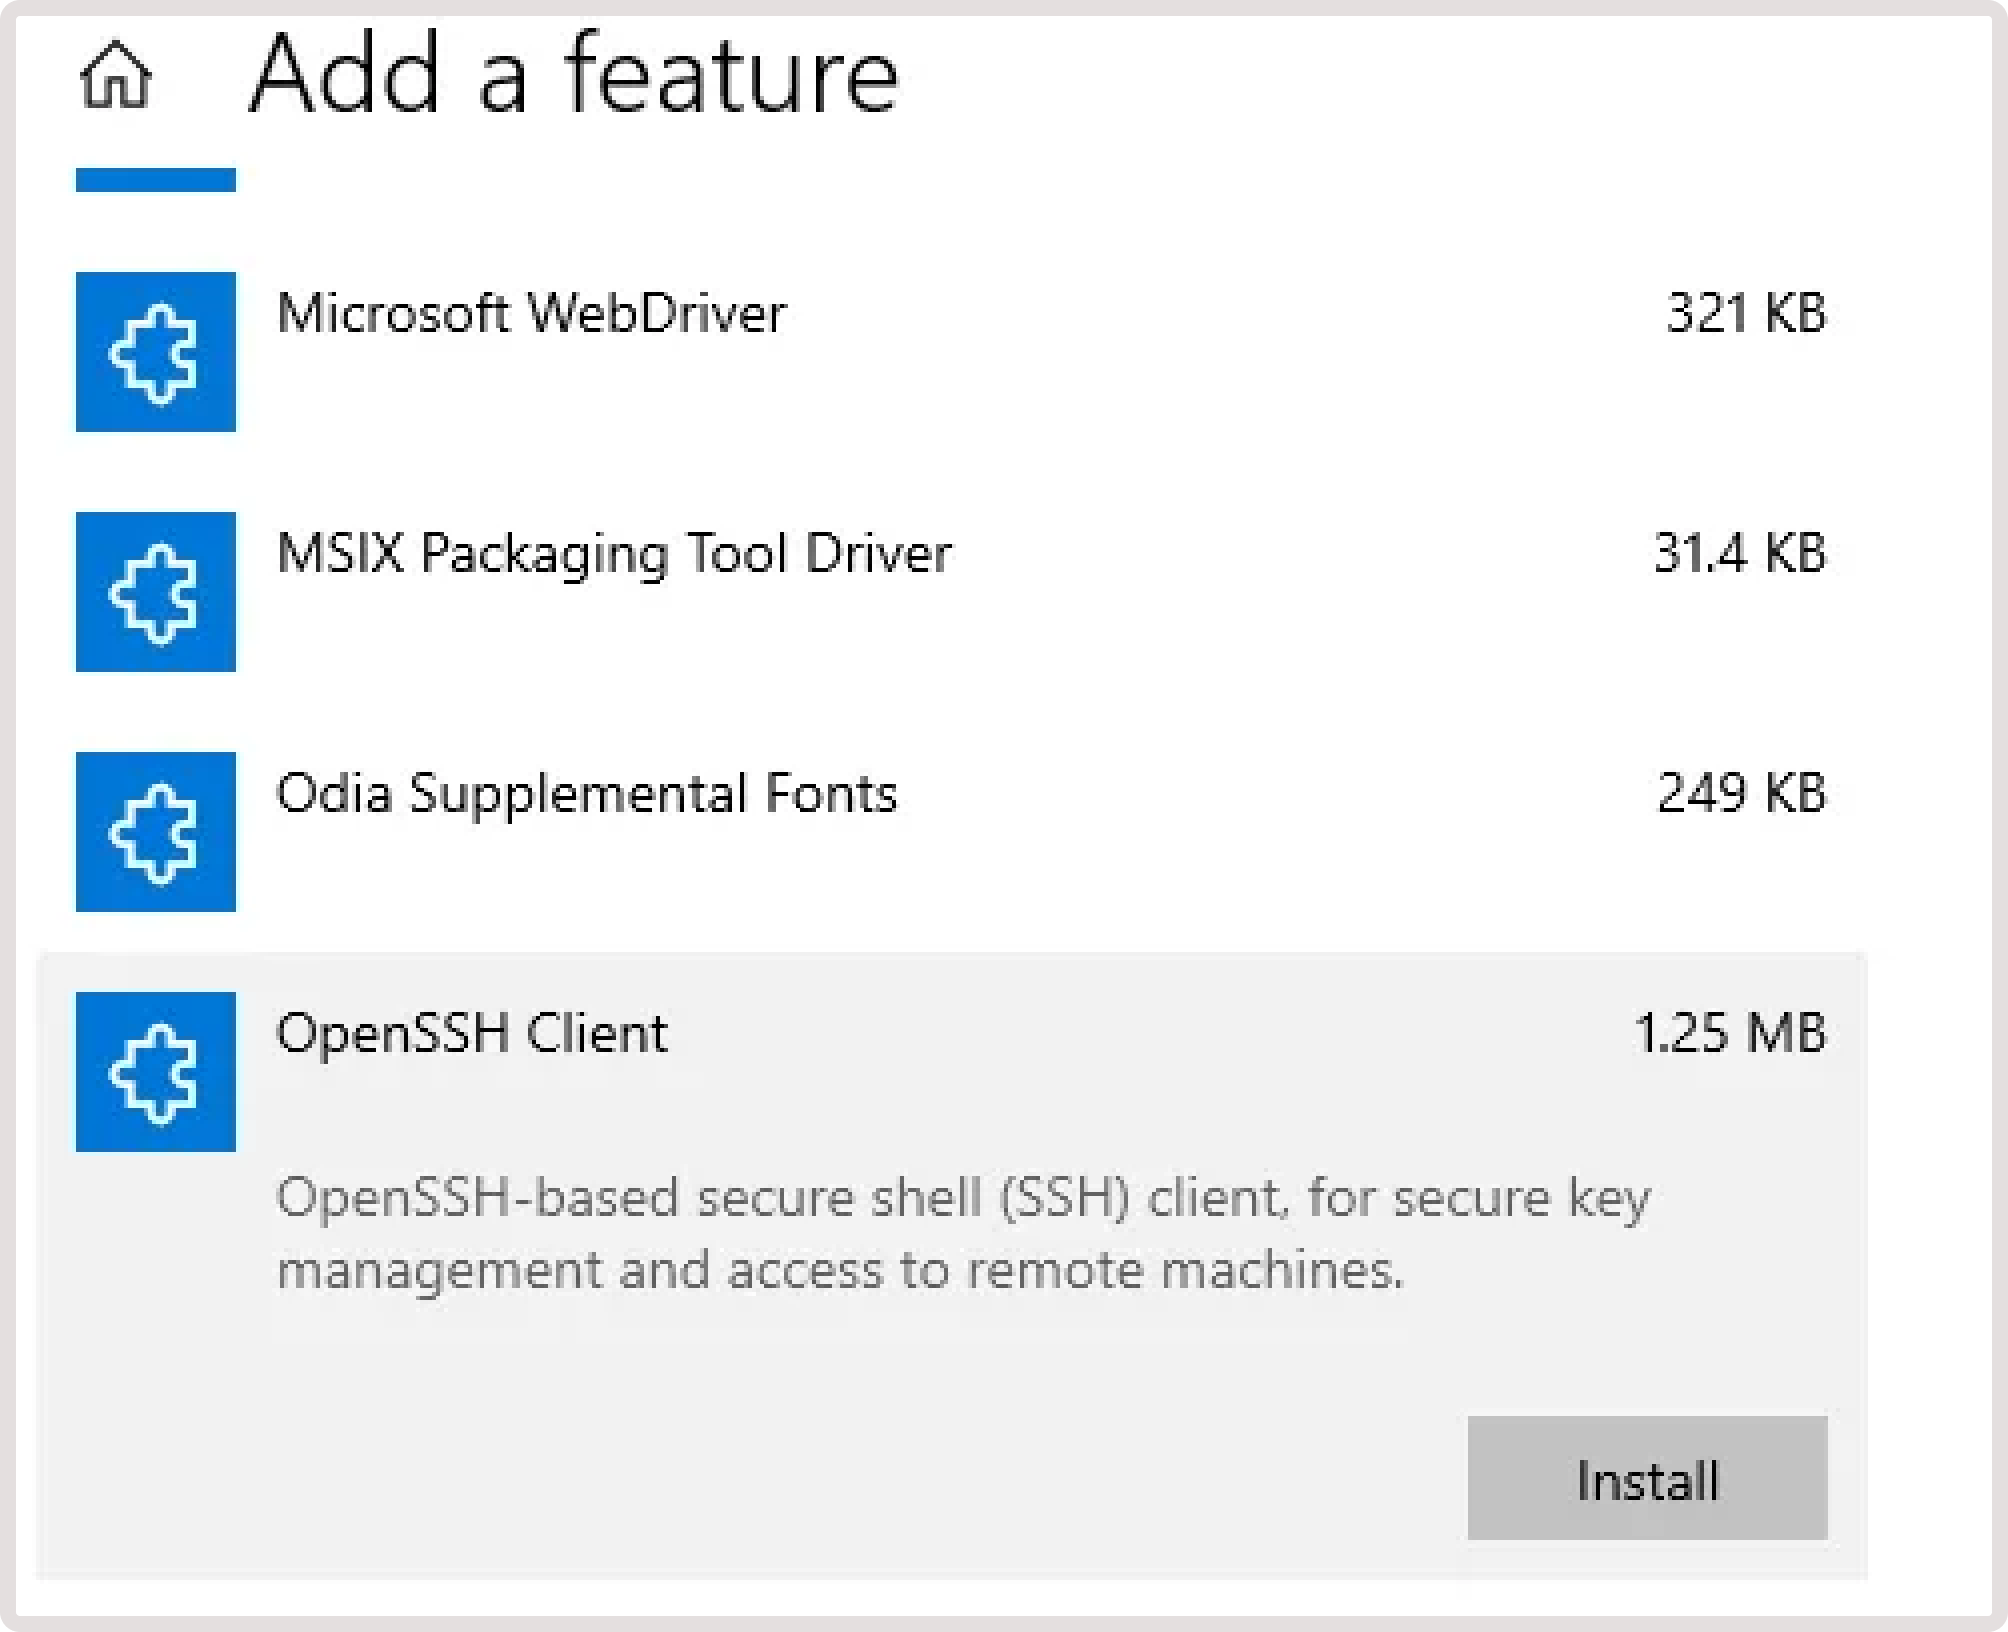
3. Find OpenSSH Client, click to expand the detailed description, and select Install.
4. After the OpenSSH client is installed, restart your computer to apply the settings correctly. OpenSSH client will become available from Command Prompt (cmd.exe).
5. Open the Command Prompt and connect to a Virtual Machine in one of the following ways:
- To connect using a pair of SHH keys, run the following command:
- To connect with a password (only if you configured it during Virtual Machine creation), run the following command and enter a password when prompted:
Tip
If you don’t know your instance’s username and public IP, you can check this information in the Customer Portal. Go to the “Cloud” section, select “Virtual Instances”, and then open your instance. Next to the Access to Console link, you’ll find the information in the following format: [login]@[ip-of your-instance].
Typically, the login coincides with the name of the OS. For example, ubuntu.
6. You’ll be asked to add the device to the list of known devices. Write yes to add or no to not add. Press Enter.
7. You’ve successfully connected to the instance.